

How to make pretty journals made out of trash and leftovers.
Welcome to Layered Page and thank you to those who follow my blog. Today is part one of my mini junk journal series where you will discover ways to use recycled materials to make pretty journals without breaking the bank. It is possible to make pretty journals with junk!
I love taking things you would normally throw out and use them for my crafting projects. It is a fun, creative, rewarding and a cheap way to craft. Junk Journals are books made through found objects, and recycled materials. In this five part series, I will be showing various ways I use those materials in my mini journals.
This past Easter we did a lot of baking and I had the opportunity to grab a Pure Vanilla Extract box to up-cycle. Hooray! In the slideshow below, you will see my process of making the journal. I used to newspaper from a packaged I received in the mail. I love when painting companies wrap the paints you order in newspaper or shipping package. Never throw those out. You can use them for all sorts of crafts and art making.
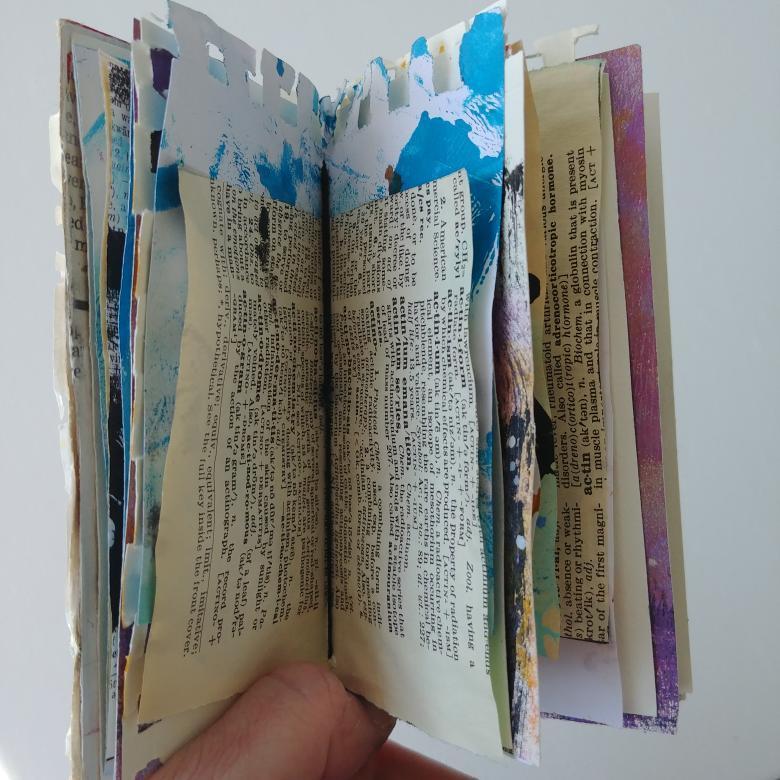
I cut the taps off and used cheap glue to add the newspaper to the outside and inside cover. Often times I use Dollar Tree glue for these projects. No need to use expensive art craft. Then I covered it with a thin layer of paint. You can use paint, white gesso, coffee to stain your cover, markers, crayons and etc…Or just use scrap paper collage. A create source for that is from your junk mail. Recycled fabric is another great material to use for covers. Do what feels right to you. Next, I grabbed some of my leftovers paints AKA painted papers and used that to start making my signatures.The paper with words on it, is from an outdated Webster Dictionary that was headed to the dumpster. Be sure to know the size of the journal to determine the size of your pages. I usually go a little smaller on the pages. Again, do what feels right to you. Some crafters like their pages to stick out. Mix it up and have fun with it. Once I have them organized in the order I want them in my journal, I’m ready to attach them to the spin. I used leftover black cotton thread this time. If you do not have a paper piercing kit, you can use a sharp sewing needle to poke the whole in the spin and to attach the pages.
When attaching the pages, I like to start in the inside middle (see pictures). Don’t feel stressed if you don’t get it perfect. It is a junk journal after all. I like mine to look a bit sloppy. Gives it the homemade look it is suppose to have. The more you practice the better you will get at this step. One the signatures secured, I cover the outside spin with recycled paper or fabric. Then I finish decorating my cover. For ephemera AKA embellishments, I use my leftover scraps/chipboard from this project. The chipboard are the tabs I cut off from the Pure Vanilla Extract box.
This project took me just under an hour to complete. If you are looking for more crafting ideas for your kids, this is it. Please supervise the project due to using scissors and a needle. Another great idea for signatures is to use your children’s school pages or drawings. As a parent, I know those things pile up fast and often times we feel we have no choice to let go of some of them.Why not use bits of them for your journals?
I hope you enjoyed this first part of my new series and if you have any questions about my process, please do not hesitate to ask below in the comment area.
Stephanie Hopkins


Very crafty-creative!
LikeLiked by 1 person
Thanks! Lots of fun to make. I’m going to need a whole room to store them. Ha!
LikeLiked by 1 person
Pingback: Mini Junk Journal: Part II | Layered Pages
Pingback: Mini Junk Journal: Part IV | Layered Pages