I craft everyday but there are some projects I want completed and feel this challenge will help in my endeavors. These are my spring journals for the coming season that I got a jump start on and would like to see them finished by the end of the season. Also, I need to replenish my ephemera stash so I’ve be mass making tags, pockets, clusters, stickers, altered paperclips and whatnot. You can follow my hashtag on Instagram #stephs100projects2022 to keep up with my progress! I’m also making short tutorials and will be posting video on YouTube soon!
I have three newly listed Spring journals for sale in my Etsy shop and will be listing two more this week! These are great journals for you to personalize. Visit my shops by clicking on each shop.
(Images are subjected to copyright. All book reviews, interviews, guest posts, art work and promotions are originals. In order to use any text or pictures from Layered Pages, please ask for permission from Stephanie Hopkins.)
I am selling art, fabric packs belts for journal closures and ephemera packs with paintings on Instagram starting now. All products are homemade by me. The ephemera packs are great for journals, card making and other craft projects. If you are not on Instagram and would like to purchase an item you see, please email me at layeredpages@yahoo.com and I will reserve your item.
My Instagram LINK or copy and paste @stephsatjourney
Fabric Packs
Fabric Pack Information: I’ve got an endless supply of textile material from all sorts of upcycled clothes, scarves, and bedsheets.
Each week, I’ll be adding in new patterns. I can cut fabric swatches up to 12″×12″. Those sizes need to be customized, Contact me for more information about that and if you’re on the lookout for anything in particular.
I use the above mentioned fabrics for my various mixed media projects, including journal covers, pockets, tags, belly bands, card making, bookmark making, collage work, blanket making and they look great!
On Fridays and Saturdays, I will be selling art, journals and ephemera packs on Instagram. I’ll eventually open another IG account for my products. The journals and ephemera will be sold once or twice a month depending on my inventory. All products are homemade by me. The ephemera packs are great for journals, card making and other craft projects. If you are not on Instagram and would like to purchase an item you see, please email me at layeredpages@yahoo.com and I will reserve your item.
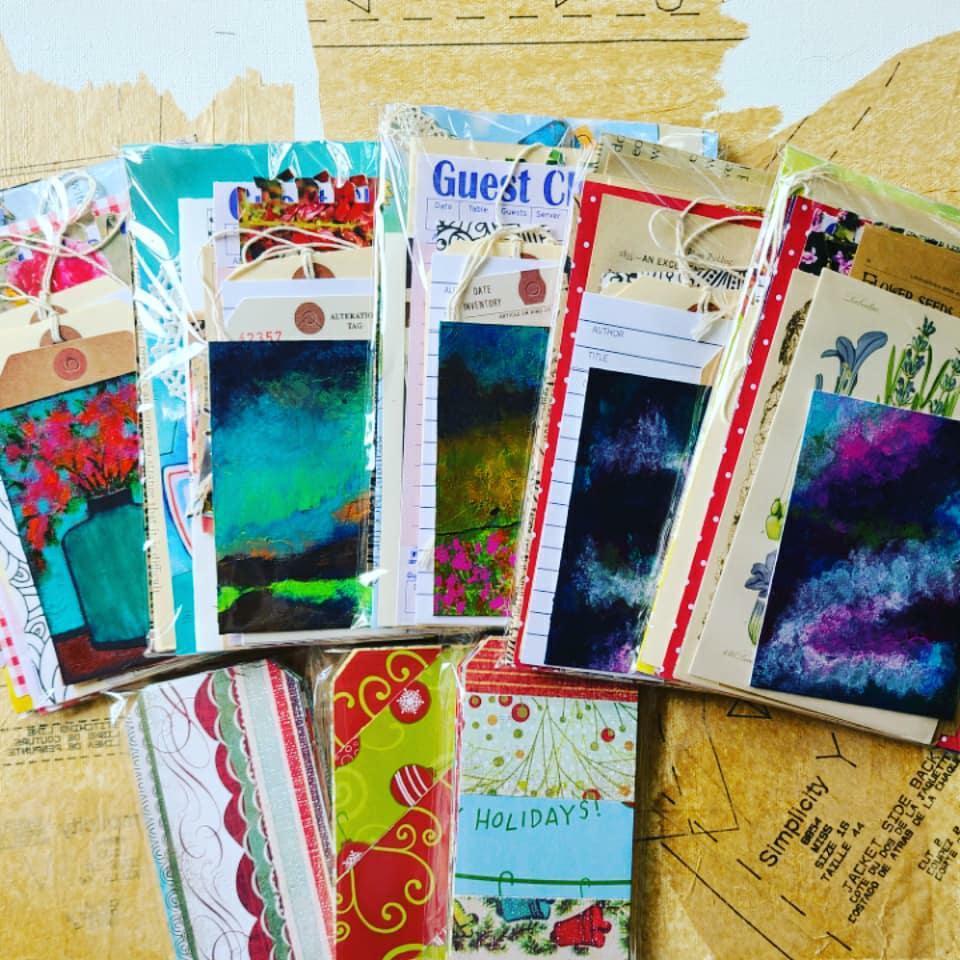
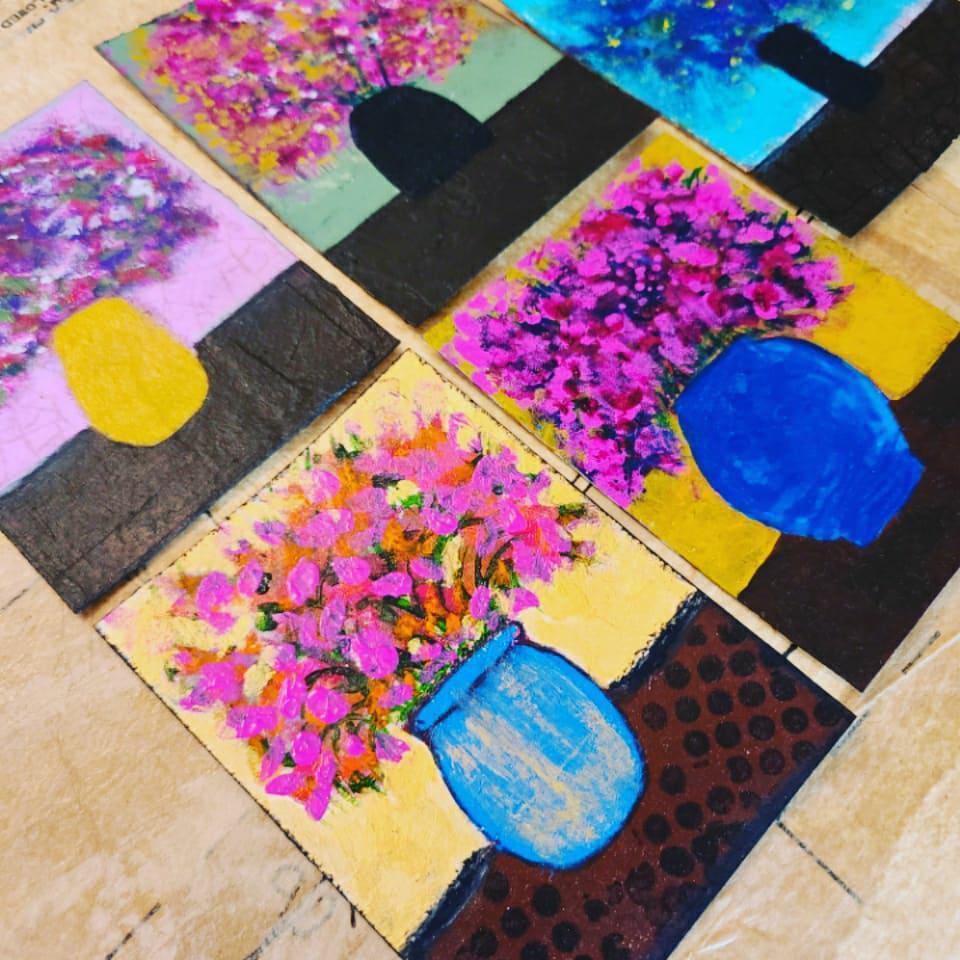
1.2″ x 2″ Original Acrylic painting on Fabriano Watercolor Painting.
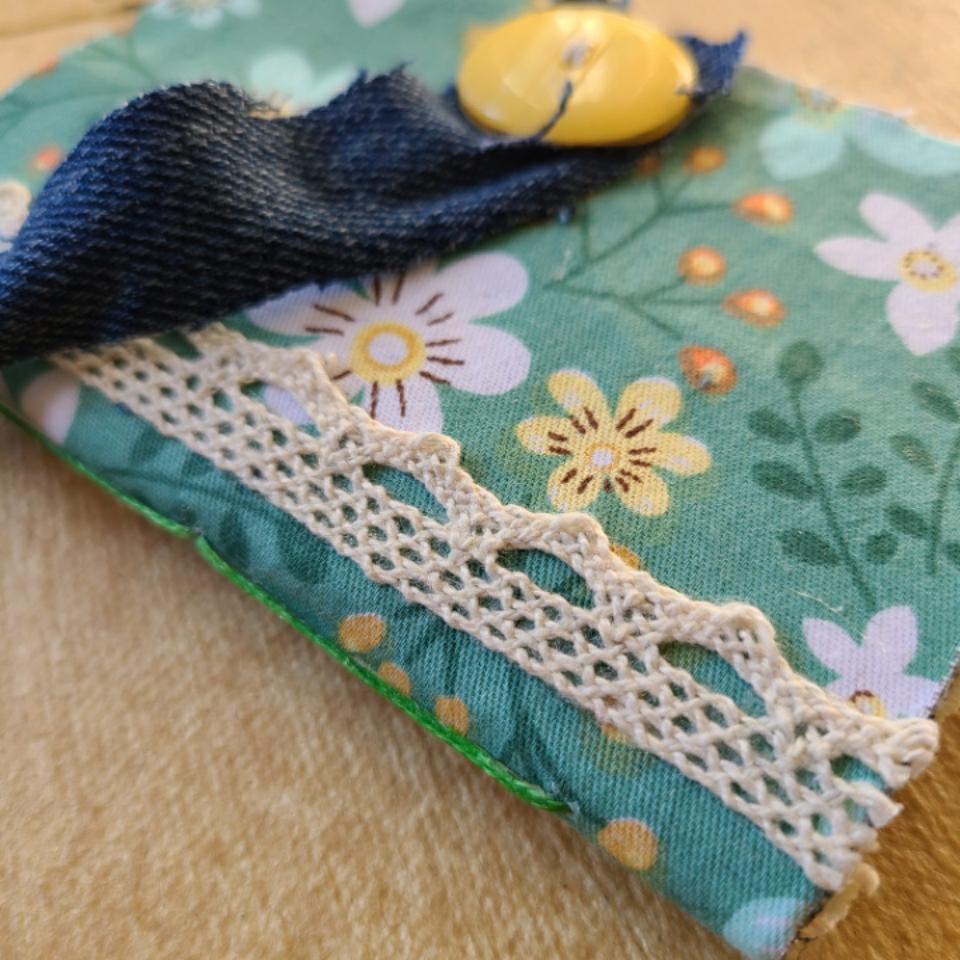
Each pack may vary on the images, color and fonts. The pack size it a little over 3”x 5” inches.
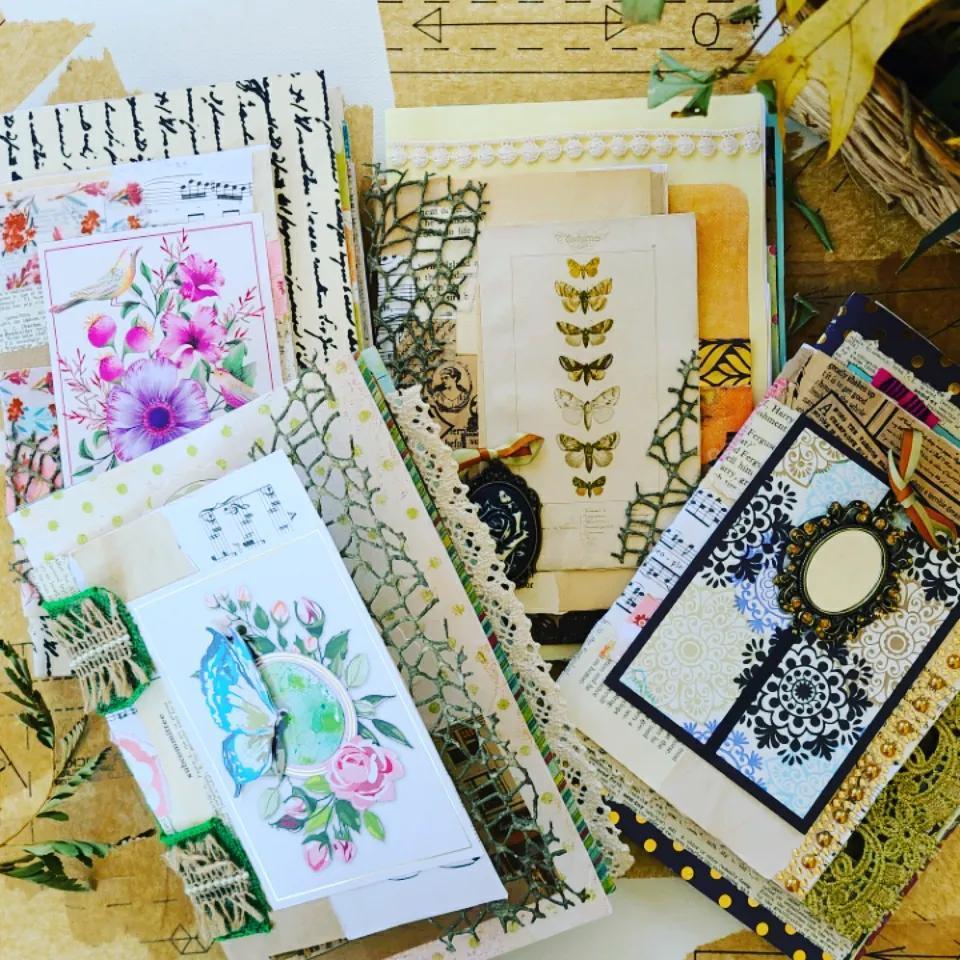
Junk Journal Ephemera Paper Kits with Original Painting
More pictures will be on Instagram.
A lot of the Paper dates from the 1920s through the present. I want to include as many decades as possible. There are 51 pieces in this series.
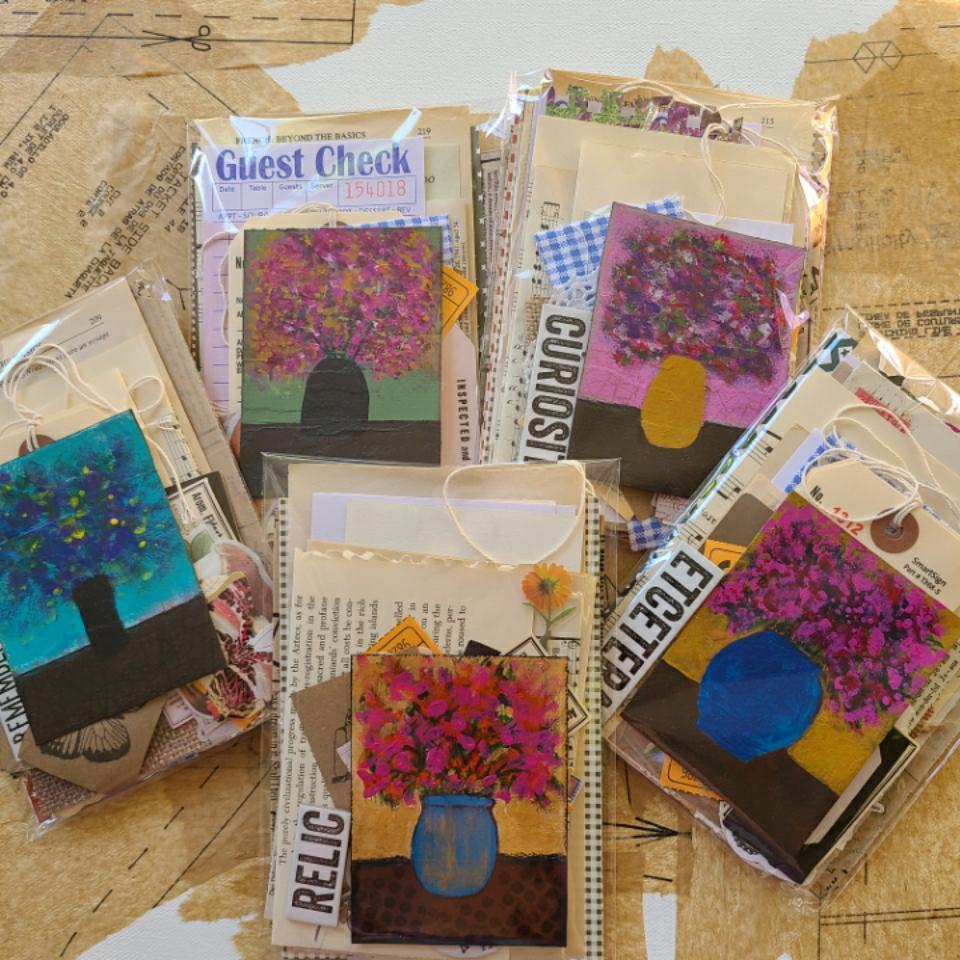
3″× 4″ Floral Acrylic Painting on Fabriano Watercolor Paper/Original Art by Stephanie Hopkins
Each pack varies on the images, colors, paintings and fonts. See pictures for an “example” of what to expect in the packs.
Mini Tags for Art and Journal Projects
More pictures will be on Instagram.
12 Tags per pack.
Each pack varies on the images, colors, paintings and fonts. See pictures for an “example” of what to expect in the packs.
The tags are mini and the sizes vary. There is hand stitching on a few of the tags. Lots of fabric and paper collage on the tags. There is room for a little writing on the back of them.
These tags are sturdy and great for art, craft, gift and journal projects.
Mini Keepsake Journals
More pictures will be on Instagram.
3’ x 4’ Mini Journal.
The size is about a centimeter–or a couplebigger- than size mentioned.
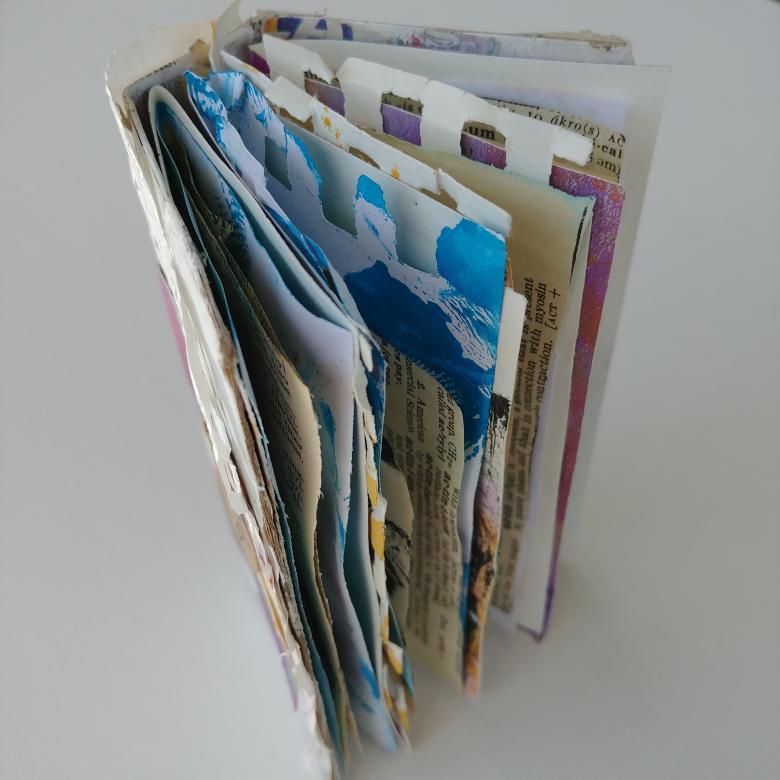
The covers are a cross between a soft and hard. They’re sturdy and flexible. Fabrics are on the cover and inside cover, along with a tag and ephemera pieces. There are two vintage papers added to each signature from a children’s book and a music book. There is a little hand stitching on a page.
*At this time, I’m only shipping in the United States.
Today is part four of my mini junk journal series. In this series you will discover ways to use recycled materials to make pretty journals without breaking the bank. It is possible to make pretty journals with junk!
I love taking things you would normally throw out and use them for my crafting projects. It’s a fun, creative, rewarding and a cheap way to craft. Junk Journals are books made through found objects, and recycled materials.
I have an insane amount of scrap paper from various craft projects. I’m constantly trying to use them up until there is nothing left to use instead of throwing them away. Well, I have way too many that are little bits of paper that have been recycled many times over. I collected a pile and say them on my desk to either create one more craft with them, or throw them away. I’ve been wanting to make little dollhouse journals for a very long time and thought the scraps would be perfect for this project! Sure enough, they were and these little journals turned out great!
I can’t not express enough how much these little books were fun and rewarding to make. The biggest challenge, will be to decorate the inside pages. This endeavor is a worthy one and will no doubt, show how creative one can be. I did, however, decorate a page on one of the journals to show you how they can look. Of course, there are thousands of ways to do this.
The trick is to fold the papers in half and join them together as a signature. Once you have done this, then you cut to size and added it to your journal cover. Then take paperclips to hold it together so you may start the binding process. I mostly used staples to bind the spin. Then added trim along the spin to cover the stable. Only two of the spins are bind with thread and are shown om my Instagram.
These little journals would make great gifts and they can be used for various reasons. Part five and the final post of this series will be a journal made out of junk mail, and plastic food wrappers and mail packaging!
Meanwhile, be sure to check out my other blog posts in this series. The direct links are provided below.
Check out my art journey on Instagram and at my Mixed Media Art gallery here at Layered Pages! My wish is for you to be inspired and encouraged.
(Images are subjected to copyright. All book reviews, interviews, guest posts, art work and promotions are originals. In order to use any text or pictures from Layered Pages, please ask for permission from Stephanie Hopkins.)
How to make pretty journals made out of trash and leftovers.
Welcome to Layered Page and thank you to those who follow my blog. Today is part one of my mini junk journal series where you will discover ways to use recycled materials to make pretty journals without breaking the bank. It is possible to make pretty journals with junk!
I love taking things you would normally throw out and use them for my crafting projects. It is a fun, creative, rewarding and a cheap way to craft. Junk Journals are books made through found objects, and recycled materials. In this five part series, I will be showing various ways I use those materials in my mini journals.
This past Easter we did a lot of baking and I had the opportunity to grab a Pure Vanilla Extract box to up-cycle. Hooray! In the slideshow below, you will see my process of making the journal. I used to newspaper from a packaged I received in the mail. I love when painting companies wrap the paints you order in newspaper or shipping package. Never throw those out. You can use them for all sorts of crafts and art making.
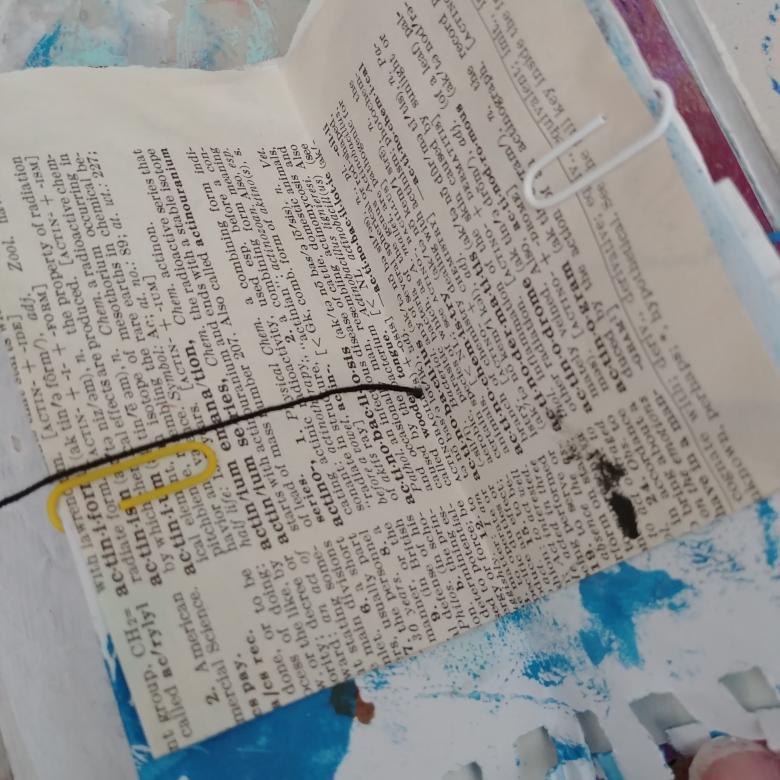
I cut the taps off and used cheap glue to add the newspaper to the outside and inside cover. Often times I use Dollar Tree glue for these projects. No need to use expensive art craft. Then I covered it with a thin layer of paint. You can use paint, white gesso, coffee to stain your cover, markers, crayons and etc…Or just use scrap paper collage. A create source for that is from your junk mail. Recycled fabric is another great material to use for covers. Do what feels right to you. Next, I grabbed some of my leftovers paints AKA painted papers and used that to start making my signatures.The paper with words on it, is from an outdated Webster Dictionary that was headed to the dumpster. Be sure to know the size of the journal to determine the size of your pages. I usually go a little smaller on the pages. Again, do what feels right to you. Some crafters like their pages to stick out. Mix it up and have fun with it. Once I have them organized in the order I want them in my journal, I’m ready to attach them to the spin. I used leftover black cotton thread this time. If you do not have a paper piercing kit, you can use a sharp sewing needle to poke the whole in the spin and to attach the pages.
When attaching the pages, I like to start in the inside middle (see pictures). Don’t feel stressed if you don’t get it perfect. It is a junk journal after all. I like mine to look a bit sloppy. Gives it the homemade look it is suppose to have. The more you practice the better you will get at this step. One the signatures secured, I cover the outside spin with recycled paper or fabric. Then I finish decorating my cover. For ephemera AKA embellishments, I use my leftover scraps/chipboard from this project. The chipboard are the tabs I cut off from the Pure Vanilla Extract box.
This project took me just under an hour to complete. If you are looking for more crafting ideas for your kids, this is it. Please supervise the project due to using scissors and a needle. Another great idea for signatures is to use your children’s school pages or drawings. As a parent, I know those things pile up fast and often times we feel we have no choice to let go of some of them.Why not use bits of them for your journals?
I hope you enjoyed this first part of my new series and if you have any questions about my process, please do not hesitate to ask below in the comment area.
Last night I started a new junk journal and worked on two pages dedicated to my Father’s Castilian Aunt Nita. She was a dancer and she passed away many years ago. I took the original photo and scanned it to photo shop and printed the photo from there. The Original photo will go into a separate family album. I have always been drawn to this photo and her pose. I wish I had known her because as my father and I were discussing her, I could tell by his voice that she was an extraordinary woman.
I made a brief video on a painting technique I did on the pages. I hope you check it out. I posted it on my Layered Pages Facebook Page HERE. When I get a tripod for my phone, I will be able to film step by step the techniques I use. When painting on book pages, you need to glue at least three pages together to add the thickness for the paint and other mediums you apply. There are several layers involved and your pages need to be strong. This journal has three signatures and I will have ten or twelve pages per signature. That is all you really want to have because of the thickness that your pages will be once completed. When you tear out pages be sure to reuse them in your journal. Any left overs will be great to up-cycle for other projects. There are a couple other art projects I worked on this week that I was going to show more of today and discuss how I made them and the end result of the work, but I think I will blog about that next week. If you have any questions on how to start a junk journal, please don’t hesitate to ask me. There are so many ways and I would be delighted to help you find what works best for you. You don’t need any fancy materials to do so. You’ll be amazed what you can use around your home to make all sorts of mixed media projects and journals. I hope you all have a blessed weekend and see you on Monday. -Stephanie
*********
(Images may be subjected to copyright. All book reviews, interviews, guest posts, art work and promotions are originals. In order to use any text or pictures from Layered Pages, please ask for permission from Stephanie.)
This weekend was pretty uneventful. I stayed home and read. worked on some art projects, blog posts, website content and watched movies. One needs those kind-of weekends sometimes, you know? Today I am sharing some pictures from my weekend. I’m still reading, Gradle Bird by J.C. Sassen and I will be through with it soon.
I love journals. I started back with it recently and I have such a busy schedule right now it helps keep me grounded.
I’m in the process of prepping the backgrounds for #christmastags I’ll be using for giveaways at Novel Expressions #Facebook Page in December.
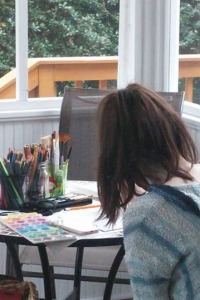
My daughter painted on canvas and when I took this picture, she wouldn’t let me see what she was working on! By the way…. she doesn’t know I took this picture. Ha-ha… Her project turned out great.
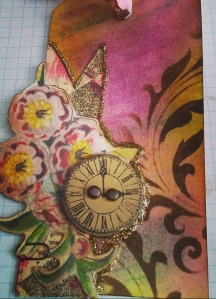
I created this tag using Tim Holtz distress inks for the background. I am so addicted to his products! They are amazing. I do believe the paper flower is from his product line as well. The picture I took doesn’t do the tag justice but you get the idea…
Two weekends ago now at a book event (BOOK EXCHANGE/MARIETTA, GA) I was sitting with author Kimberly Brock and she said she had a friend coming and her name is Emily, do I know her? I said she sounded familiar…. She sat between us and the three of us were having a great time listening to the four southern authors that were being featured at this event. It just now came to me that Emily is the author of The Weight of Lies! I reviewed that book and loved it. Darn it all, I didn’t get a photo with her! Total fan girl here! I am definitely going to include her in my southern writer’s series here at Layered Pages.
Thank you for visiting with me today and be sure to come back this week for more fun posts.